Friday, May 28, 2010
Meyer Lemon Scone
I really was not too willing to make scones because once upon a time I heard from a friend who also bakes that it was difficult to make, yadeyadeya.... So never in my mind did I think to try and make these. Thanks to Krystin who gave me the confidence and reassured me that it's not hard at all. So this morning I gave it a shot. Here's some photo to show off my amateur scone making skills. I had no idea which direction to cut the dough so that I could make triangle shapes. So I did the best I could without having to re-knead the dough too much. I don't particularly enjoy working with sticky dough. Even though the shapes are a little funky, I can guarantee that you won't just eat one scone. Why wouldn't you?? Afterall, there's 3 sticks of butter in this recipe. I had to double check and triple check the butter amount to make sure i didn't misread it. I was finally convinced after glancing it over three times. Now I know what the secret ingredient is in all those scones that I have consuming all these years.
Meyer Lemon Scone
adapted from Barefoot Contessa's Cranberry Orange Scones
Makes 10-12 scones
For the scones
4 1/4 cups all-purpose flour, plus some for dusting
1/4 cup granulated sugar
sugar in the raw for dusting
2 tablespoons baking powder
2 teaspoons kosher salt
2 tablespoons Meyer lemon zest
3/4 pounds cold unsalted butter, diced
4 extra large eggs, lightly beaten
1 cup cold heavy cream
1 cup dried cranberries
For the egg wash
1 egg, beaten
2 tablespoons water
Optional Glaze
1/2 cup plus 2 tablespoons confectioner's sugar
4 teaspoons freshly squeezed meyer lemon juice (can use orange juice)
Directions
Preheat the oven to 400 degrees F.
1. In the bowl of an electric mixer fitted with a paddle attachment, mix 4 cups of flour, 1/4 cup sugar, the baking powder, salt and Meyer lemon zest. Add the cold butter and mix at the lowest speed until the butter is the size of peas. Combine the eggs and heavy cream and, with the mixer on low speed, slowly pour into the flour and butter mixture. Mix until just blended. The dough will look lumpy. Combine the dried cranberries and 1/4 cup of flour, add to the dough, and mix on low speed until blended.
2. Dump the dough onto a well-floured surface and knead it into a ball. Flour your hands and a rolling pin and roll the dough 3/4-inch thick -- I prefer circle. You should see small bits of butter in the dough. Keep moving the dough on the floured board so it doesn't stick. With a floured knife, cut the dough into triangles. Place the scones on a baking pan lined with parchment paper. Collect the scraps neatly, roll them out, and cut more triangles.
3. Brush the tops of the scones with egg wash, sprinkle with sugar in the raw, and bake for 20 to 25 minutes, until the tops are browned and the insides are fully baked. The scones will be firm to the touch. Allow the scones to cool for 15 minutes and then whisk together the confectioners' sugar and orange juice, and drizzle over the scones.
Pig Picking Cupcakes
I made these into cupcakes because I don't have round cake pans. These are super moist and light. It's really an easy recipe to follow and everyone should try making these. I finally got to try my new piping tools. I used the big star tip and decorated the cupcakes with cool whip mixed with crushed pineapple and vanilla pudding. Instead of using 16oz of cool whip, i only used 8oz and it worked out fine. These puppies look a lot more appetizing than my previous cupcakes. See for yourself and you'll probably nod your head too.
Pig Pickin' Cake
Ingredients
1 (18.25 ounce) package yellow cake mix
1 (11 ounce) can mandarin oranges, juice reserved
4 eggs
1/4 cup vegetable oil
1 (16 ounce) package frozen whipped topping, thawed
1 (15 ounce) can crushed pineapple, drained
1 (3.5 ounce) package instant vanilla pudding mix
Directions
Mix together cake mix, canned oranges with juice, eggs, and oil. Pour batter into three greased and floured 8 inch round pans. Layers will be thin.
Bake at 350 degrees F (175 degrees C) for 25 to 30 minutes, or until cake tests done. Cool layers on wire racks.
Mix together whipped topping, drained pineapple, and instant pudding mix. Fill and frost the cooled cake. Refrigerate until ready to eat.
Sunday, May 23, 2010
Martha Stewart's One-Bowl Chocolate Cupcakes
I've been wanting to practice piping cupcakes to make them look more professional and yesterday was a great opportunity to do so. I found Martha stewart's recipe online and decided that chocolate would go well with just about any kind of frosting? The cupcakes were easy to prepare and bake. My little helper Chance placed the liners in the muffin pan for me (saved a few minutes). I wanted to make frosting that wasn't so rich and fattening. I realized that I don't want to use a recipe that calls for a couple sticks of pure butter in my frosting and I don't necessarily want straight cream cheese either with all the extra sugar added. I think I just about eliminated all the key ingredients in frosting, huh? The other option I had was a merengue type frosting using egg whites but then I didn't want to eat or serve raw eggs either. So I decided to experiment with a few ingredients to see if I can whip up something. The goal was to make a coffee flavored frosting using egg whites (somewhat cooked) by using a double boiler. Well, I don't know what went wrong, but it was such a big flop. I tried saving it by adding cream cheese and more sugar but it was at a point of no return. The mixture was to fluid, even after a few minutes of whipping. I think maybe the steps were out of sequence or maybe too much liquid was added. Did I stop here, of course not! I was determined to make frosting and so I gave it another try using only 1 egg white and 1/2 the sugar and then added instant coffee and a little water. Again, it didn't turn into a fluff, just flat liquid :( I still couldn't figure out what went wrong? At this point, it was time to go to work. While at work, it was still hanging over me so I went online to find other recipes. I came across this: whipped cream cheese frosting. It was supposed to be lighter than buttercream. It uses heavy whipping cream and cream cheese. When on my lunch break, I had to make this and it really turned out well. I thought the sugar content could be cut back. Maybe it's just me but I find that most frostings are way too sweet and most of the time I don't eat it anyway. I usually scrape it off and throw it away when no one's watching. Is it mainly used to dress up cupcakes?? I don't care much for it but my little boy loves it. That's all he eats when he's having a cupcake. He leaves the cake part once he's done licking the frosting. I didn't get to take any pictures this time. I'll post it when I make it next time.
Martha Stewart's One-Bowl Chocolate Cupcakes
Makes 18 to 24
3/4 cup unsweetened cocoa powder
1 1/2 cups all-purpose flour
1 1/2 cups sugar
1 1/2 teaspoons baking soda
3/4 teaspoon baking powder
3/4 teaspoon salt
2 large eggs
3/4 cup warm water
3/4 cup buttermilk
3 tablespoons safflower oil
1 teaspoon pure vanilla extract
Directions
Preheat oven to 350 degrees. Line standard muffin tins with paper liners; set aside. Sift together cocoa powder, flour, sugar, baking soda, baking powder, and salt into a large bowl. Add eggs, warm water, buttermilk, oil, and vanilla, and mix until smooth, about 3 minutes. Scrape down the sides and bottom of bowl to assure batter is well mixed.
Divide batter evenly among muffin cups, filling each 2/3 full. Bake until tops spring back when touched, about 20 minutes, rotating pan once if needed. Transfer to a wire rack; let cool completely.
First published
Preheat oven to 350 degrees. Line standard muffin tins with paper liners; set aside. Sift together cocoa powder, flour, sugar, baking soda, baking powder, and salt into a large bowl. Add eggs, warm water, buttermilk, oil, and vanilla, and mix until smooth, about 3 minutes. Scrape down the sides and bottom of bowl to assure batter is well mixed.
Divide batter evenly among muffin cups, filling each 2/3 full. Bake until tops spring back when touched, about 20 minutes, rotating pan once if needed. Transfer to a wire rack; let cool completely.
Frosting Recipe Link: from Allrecipes
http://allrecipes.com/recipe/whipped-cream-cream-cheese-frosting/detail.aspx
CHOCOLATE CHIP PECAN COOKIES
Thanks Nga for this amazing cookie recipe. I tried making these and it was absolutely delicious. Toasting the pecans really made a difference and I never on my own would have thought to do that. Great Recipe. I was running late to work and didn't have a second to take some pictures :( Below is the recipe for this and Kristyn, I hope you don't mind sharing this with everyone.
CHOCOLATE CHIP PECAN COOKIES
1/2 cup granulated sugar
1/2 cup firmly packed light or dark brown sugar
1 stick butter, cold, cut into small pieces
1 large egg
1 teaspoon vanilla extract - I always add a splash more..it'll make the cookies tastier
1/2 teaspoon baking soda
1 1/4 cups all-purpose flour
1/2 teaspoon flaky sea salt (I add a bit more b/c I like salty sweet cookies, so add an extra pinch)
1 1/2 cups semisweet chocolate chips
1 cup pecans, toasted and chopped (I buy small pre-chopped pecans but if you prefer, buy whole pecans, toast in a 300 degree oven for 7-10 minutes, but watch them carefully so they don't burn!)
Adjust the oven rack to the top third of the oven and preheat to 300F (150C). Line baking sheets with parchment paper.
Beat the sugars and butters together until smooth. Mix in the egg, vanilla, and baking soda.
Stir together the flour and salt, then mix them into the batter. Mix in the chocolate chips and nuts.
Scoop the cookie dough into 2-tablespoon (5cm) balls and place 8 balls, spaced 4 inches (10cm) apart, on each of the baking sheets.
Bake for 18 minutes, or until pale golden brown. Remove from the oven and let cool. :)
Thursday, May 20, 2010
Homemade Yogurt
A few days ago, I made my usual homemade yogurt using longevity sweetened condensed milk and the result was very disappointing. I can't really figure out what went wrong but it was too runny. Didn't look too appetizing. I have made these quite a few times and each time it turned out better. Apparently not this last time. Here's the recipe if anyone is interested:
Ingredients:
1 starter Plain yogurt (I bought mine from the vietnamese store) cup size
1 can longevity condensed milk sweetened
Boling water
milk (I use 2% because that's what i have on hand all the time)
9 big baby food jars with caps
Instructions:
Boil about 1 cup of water.
In a large mixing bowl, empty the can of condensed milk (do not discard this empty can)
Use the empty can to measure out 1 canful of boiling water and add to the mixing bowl to dissolve the milk.
Stir well til completely dissolved. Using the can, measure out two canfuls of milk and add to the mixing bowl.
Next, add the starter yogurt (stir the yogurt before adding it to the mixture). Continue to stir once it's in the bowl to make sure that it's evenly distributed.
Boil 1/2 kettle of water on the side to use as a water bath.
While waiting, ladle the yogurt into the food jars
Place the jars in a big pot and pour hot boiling water into the pot. Fill it up to about 3/4 of the height of the jars.
Place a towel over the jars and place lid over. Leave it at room temp for about 6-12hrs, then cap the jars and store in the fridge. If you want it to be more tart, let it sit out at room temp a little longer.
Tuesday, May 18, 2010
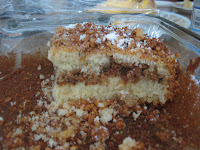
Starbucks Streusel Crumb Cake
Today I got try this new recipe I found on the internet for Starbuck's Crumb cake. The hubby and I always get this cake when we buy their pastry. I have to say that over the years the portion of this cake sold has gotten smaller and the price has gone up (like $1.95 for a tiny square of cake!). Well, I baked a 9"x13" sized cake for probably less than $5.00 and got a lot of servings out of it. It got a little dry because my oven was acting up again. It does this every so often...locks itself...and there's nothing I can do to open it except to wait for it to unlock. Sometimes I can get it to open up but it's not always successful. I had to leave for the gym so someone else was going to take it out of the oven when it was done but she couldn't get it to open up, so the cake sat in the oven for an extra hour. It came out not burnt but quite dry. It was still very delicious. This recipe is definitely a keeper. Here's the recipe if you want to give it a try:
http://www.recipezaar.com/recipe/Streusel-Crumb-Coffee-Cake-105772
Sugar Cookies with Marshmallow Fondant and Royal Icing
This past saturday, I was brave enough to make these sugar cookies, marshmallow fondant, and royal icing from scratch. I had never rolled cookie dough my entire life and was a bit nervous about it. I wasn't really sure how much flour to use and couldn't decide whether to roll it over wax paper or on my counter top. I went with using the wax paper just to keep it from getting too messy. I had the dough refrigerated for more than two hours and it was still a little sticky and hard to roll as it was sticking onto the pin. I had to ask the hubby for help and he gave a good tip...to add more flour... so I did and it worked much better. I had recently bought some cookie cutters for a baby shower and the shapes were so adorable. I had a onesie, bottle, bassinet, rattle, baby foot, and a flower shaped cutter. The first few cut outs were deformed (there's a first for everything). By the time I got to my last batch, I felt like an expert. I was going a lot faster. I must have made 4 or 5 dozens worth of sugar cookies (it was a lot more than I expected). The marshmallow fondant was quite a mess too. I forgot to rub my hands in butter first before kneading the marshmallow and boy was it sticky icky (no kidding!) It took me a good few minutes to get it all off my fingers. When it did, it was a lot easier to handle...much like playdoh. I rolled it, cut it and then placed it on the cookies. It looked really cute. I made a small batch of fondant chocolate flavored just to test out...I think next time, I will add more chocolate to it for deeper/darker brown color and also for a better flavor. I colored some of the icing in blue to use as an outline for the cookies. I could have done whatever design in whatever color I wanted to and it would have turned out nice. I just didn't have the time to play too much with this. I tested out the food coloring just to get a feel for how much to add and I have a pretty good idea now. What a fun day that was for me to make these cookies (just a little tiring). I even got little helpers to assist with rolling and cutting out the cookies and the fondant. End of this month, we'll be making these cookies again.....
Sugar cookies: can't remember which one i used but any recipe should do
Icing recipe: http://cakecentral.com/recipes/1961/alices-cookie-icing
Marshmallow Fondant recipe: http://www.wilton.com/forums/messageview.cfm?catid=7&threadid=77236
Thursday, May 13, 2010
Chocolate Peppermint Cupcake
Today, I had quite a task on hand making this chocolate peppermint cupcake from scratch. The cake part for easy to follow and make. The most exciting part of this chocolate recipe was the 1 cup of coffee that I added. I also made the filling made of white Chocolate Peppermint Ganache. The most labor intensive was crushing the peppermint candy into bits. Actually, I had some help with this step :)This didn't turn out so great. Was a little too thick so I had to thin it down with the heavy cream. For the frosting, I made this Mint Swiss Meringue Buttercream. It was amazing what an electric mixer can do. I used it to whip the egg white and sugar into a white light fluff. I was in awe as I watched this happen before my eyes. For a moment I felt like a kid again. I really enjoyed this step the most but it gets a little messy for me. Cleaning up was not fun at all. The last thing I did was pipe the frosting over the cupcakes using my new decorating kit. However, this didn't turned out as nicely as I would have liked. Doesn't look professional yet. I am working on perfecting my decorating techniques. One day, my cupcakes will look store bought. That is the plan...and will have pictures to show for it too.
Here's where I got this recipe: http://www.beantownbaker.com/2008/12/chocolate-peppermint-cupcakes_26.html
Tuesday, May 4, 2010
Cake Bites
The other day I attempted to make these cake bites with peanut butter candy mold. I have been wanting to make these for a while and couldn't wait to give it a try when I got the mold in the mail. It was a matter of time for me. I finally did have some time and off I went with this project. I have to say that it turned out pretty well. Everyone at work enjoyed it and so does my three year old. He kept asking for more "pink cupcakes". Anyhow, check out the photos and you'll see why it was a hit. Here's the recipe website: http://www.bakerella.com/cupcake-bites-made-easy/
Granola cookies and Chocolate chip cookies
Tomorrow is Teacher's appreciation at Chance's school. I volunteered to help set up and bring in some sweets. While my little one is taking a long nap, I managed to bake about 4 dozens of each kind. I am thankful for my stand up mixer. I didn't have to manually mix the dough. I think the chocolate chip cookies turned out better than ever before. I have made these quite a few times already and each time it seems to come out different, not the way I would have liked. However, I am not sure what I did differently this time but the cookies look pretty good, almost like the ones you can get from the store. The Granola cookies are amazing too. It was my first try at it and won't be my last. It tastes delicious.
Here is the link to the website where I got the granola recipe:
http://www.whiskblog.com/2008/08/tuesdays-with-doriegranola-grabbers.html
Chocolate Chip cookie recipe: Tollhouse recipe.
Sunday, May 2, 2010
Subscribe to:
Posts (Atom)