Friday, August 27, 2010

Pecan Shortbread Cookies


These were some of the most delicious cookies I've ever tasted. It was crumbly, buttery, nutty and not overly sweet. Tracy and I both admit that we couldn't just eat one and put it away. The chocolate dipped ones were just as good although it got to be a little messy due to the summer heat. Tracy brought some home to share with her hubby and she said he couldn't stop eating them either. She said the cookies didn't last longer than a day. I saved some for Chance on the kitchen island but didn't let him know because I didn't want him to make a meal out of it. However, when Tam and I were munching the next day, Chance obviously saw us and helped himself to a few and was sharing enough to give his brother Ty some as well and before you know it, the entire plate was gone. It's nice to see that everyone (adults and kids) enjoyed this recipe. I'll definitely make this again.

Pecan Shortbread
1999, The Barefoot Contessa Cookbook, All Rights Reserved
Prep Time: 15 min Inactive Prep Time: 30 min Cook Time: 20 min Level:
Easy Serves:
20 to 24 cookies Ingredients
3/4 pound unsalted butter, room temperature

1 cup sugar
1 teaspoon pure vanilla extract
1 teaspoon pure almond extract
3 1/2 cups all-purpose flour
1/4 teaspoon salt
1 1/2 cups small diced pecans
Directions
Cook's Note: This recipe can easily be doubled, as what was shown in the episode.


Preheat the oven to 350 degrees F.


In the bowl of an electric mixer fitted with a paddle attachment, mix together the butter and sugar until they are just combined. Add the vanilla and almond extracts. In a medium bowl, sift together the flour and salt, then add them to the butter/sugar mixture. Add the pecans and mix on low speed until the dough starts to come together. Dump onto a surface dusted with flour and shape into a flat disk. Wrap in plastic and chill for 30 minutes.


Roll the dough 1/2-inch thick and cut into 2 1/2-inch squares with a plain or fluted cutter (or cut into any shape you like). Place the cookies on an ungreased baking sheet.


Bake for 20 to 25 minutes, until the edges begin to brown. Allow to cool to room temperature and serve.

Wednesday, August 25, 2010

Thai Red Curry with Chicken


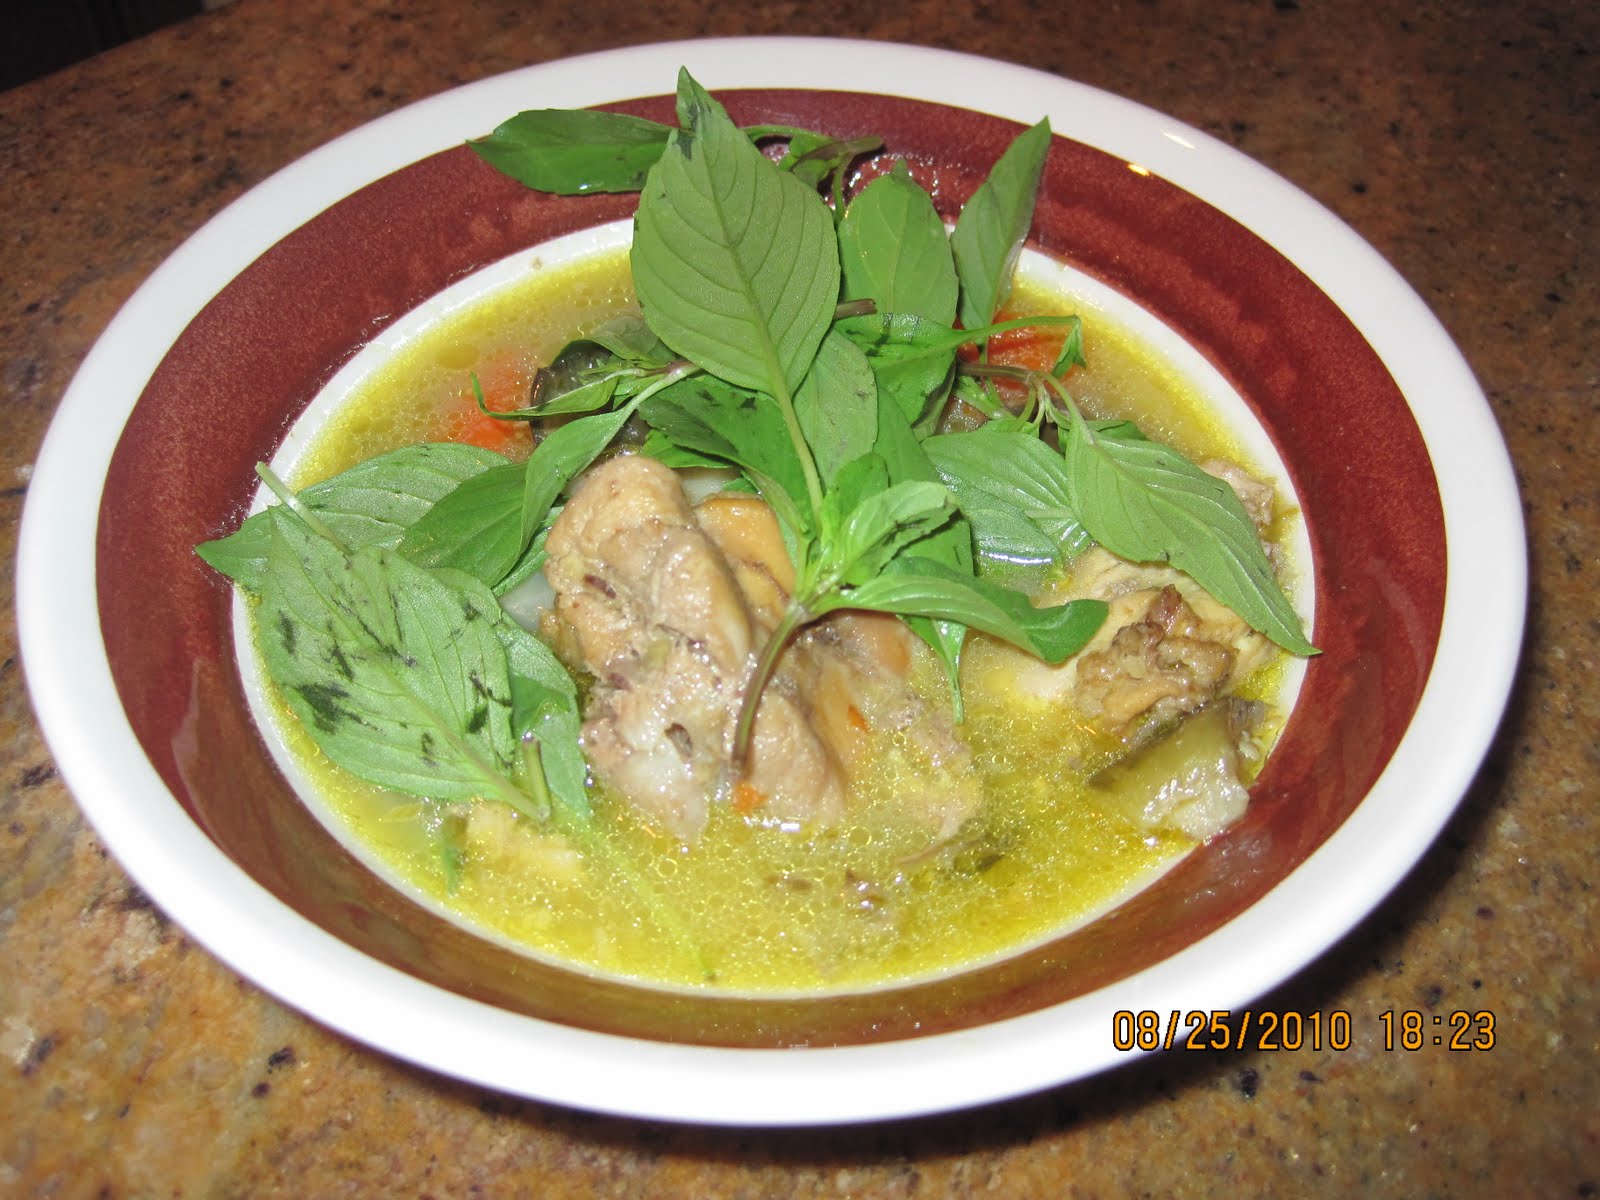
I found this recipe for red curry and really like that there's also a recipe on how to make your own curry paste. I never thought that making curry paste could be this simple. It's just a matter of gathering all the ingredients and pureeing everything into a paste. The most time consuming part of making this is the paste itself. Preparing the curry is quite easy. I didn't exactly use the same ingredients as called for in this recipe. I substituted the duck meat for chicken and added carrots, russet potatoes, thai tomatoes, and was going to add taro as well but the pot was getting to be too full, so I left it out. I also used only 1 can of coconut milk and added water to cover the ingredients. I had to also add some salt and fish sauce for seasoning/taste. This turned out quite alright. Although, next time I would probably add more paste, more veggies, and more salt/fish sauce. I tend to like my food well seasoned especially if I am going to eat it with rice/bread.


http://wanderingchopsticks.blogspot.com/2008/11/thai-red-curry-paste.html
Thai Red Curry Paste
Adapted from "Step-By-Step Thai Cookery" by Hilaire Walden.

For about 1/2 cup, you'll need:
2 stalks lemongrass, thinly sliced
1 2-inch knob ginger (or galangal if you want to be authentic)
Peel from 1 lime (kaffir if you want to be authentic)
1 tblsp Mam Ruoc (Vietnamese Fermented Shrimp Paste)
1 shallot
4 garlic cloves
2 large chilies or 6 small chilies, or however much heat you can stand, de-seed if necessary
2 tsp brown sugar
1 tsp coriander seeds
1 tsp cumin
1 tsp black pepper

Add all ingredients to a food processor and puree until finely minced, scrapping the sides down if necessary. Freeze any leftover paste.


Thai Red Curry with Roast Duck, Bamboo Shoots, Eggplant, and Pumpkin

For a very large pot, you'll need:
Thai Red Curry Paste
About 1 cup pumpkin, diced
About 1 cup bamboo shoots, sliced
About 6 Thai eggplants, cut into segments and soak in salty water to draw out mucous
2 13-oz cans Coconut Milk
1/2 roast duck
As many sprigs of Thai basil as you'd like, leaves removed
Nuoc Mam (Vietnamese Fish Sauce), to taste

Begin by making my recipe for Thai red curry paste, or use packaged paste. Set aside.

Dice the pumpkin into 1-inch chunks. If the pumpkin rind is too hard, pop it in the microwave for 5 to 10 minutes to soften.

Cut the Thai eggplant into quarters or eighths and let them soak in salty water to draw out the black mucous. You may substitute with one Japanese eggplant or a small Italian eggplant.

Pull the roast duck from the bones, skin also if you wish. Set aside.

Do not shake your can of coconut milk. See the coconut cream in the photo below? Spoon that out, reserving the liquid in the can. I like my curries very creamy, so do this with both cans. If you want to cut down on coconut milk, then use just one can and sub water for the rest.

Dry fry the coconut cream with as much curry paste as you'd like. I like a lot, so I used my whole batch. You can start with 1 or 2 tblsp of paste and see how you like it. It's easy enough to add more, but you can't remove it once everything is incorporated.

Keep stirring until you get a nice, smooth paste.

Then add in the rest of the coconut milk liquid. Then fill each can halfway with water, swish it around get the last of the coconut milk and pour that into the pot. If you're only using one can of coconut milk, then fill up the can completely so that there's enough liquid for the curry. Drain the eggplants and add them, along with the pumpkin and bamboo shoots. Make sure there's enough water to cover all the ingredients. Turn the heat down to medium-low and let simmer for at least half an hour.

Check to see if the curry has thickened to your liking and the vegetables have softened. Add a few squirts of fish sauce if necessary. Add the roast duck and Thai basil leaves and let simmer for an additional 10 minutes.

Serve with french bread or with rice.

Sunday, August 22, 2010

Chocolate Matcha Bundt Cake

I actually didn't make this in a budnt pan because I didn't have 1hr&15min to wait for this to bake so I used a 9x13 brownie pan and cut the bake time to about 30 minutes. It came out pretty well. I didn't do as good a job creating the marble look because I just dumped the entire chocolate mixture first and then the matcha mixture and sort of stirred the two together. It got all mixed up and the matcha green ended up looking more brown. Don't let the looks deceive you. It really is a delicious cake. Of course you have no idea what I am talking about because I didn't take any pictures. Maybe next time I'll do better..


Chocolate Matcha Bundt Cake
http://www.bakerella.com/bundt%E2%80%A6-whats-matcha/

Chocolate Mixture
1 1/2 cups all-purpose flour
1/2 cup cocoa
1 1/2 tsp. baking powder
1/2 tsp. salt

Matcha mixture
1 1/2 cups all-purpose flour
2-3 Tbsp matcha powder
1 1/2 tsp. baking powder
1/2 tsp salt

Wet ingredients
3 cups sugar
1 cup unsalted butter, room temperature
3 eggs, room temperature
1 3/4 cup milk, room temperature
1 tsp vanilla

Preheat oven to 325 degrees.
Grease and flour (or cocoa) a 10 or 12 cup Bundt pan. (If using a 10-cup pan, you can reserve any extra batter for cupcakes.)
With a wire whisk, mix the dry ingredients for the chocolate mixture in a small bowl and set aside.
In another small bowl, do the same for the matcha mixture.
Using a mixer, cream the butter and sugar. Add the eggs, milk and vanilla and mix until thoroughly combined.
Divide the creamed mixture evenly in two separate bowls.
Slowly add the chocolate mixture to one half of the creamed mixture and mix thoroughly.
Then, add the matcha mixture to the other half of the creamed mixture and mix thoroughly.
Drop alternating spoonfuls of each mixture into the bundt pan until it’s about 3/4 full.
For a marbled effect, gently run a knife through the two batters in a swirling motion. (Once or twice will do the trick.)
Bake for about 1 hour and 15 minutes.

Saturday, August 21, 2010

Chocolate Chip Pecan Cookies & Chocolate Chip Walnut Cookies


I have been craving these chocolate chip cookies for days now and finally got the chance to make a batch of each kind. I got greedy and couldn't just make one kind. I had all the ingredients for both, so I figured why not. You might think that I ate it all myself but that was not the case. I did share a lot of these cookies with coworkers and friends and family and whomever wants one. I think everyone enjoyed it. Who doesn't like a cookie every now and then or maybe one a day. I think one per day is not too bad right? It might not be good for your health but it sure is good for the taste buds and sometimes that overrides everything else. I don't really want to admit it, but this happens to me a lot. yeah.

Magnolia Bakery Vanilla Cupcakes & Snickerdoodles (Tina & Lena's Birthday)


We celebrated Tina's early birthday and Lena's belated birthday with Cupcakes and snickerdoodles baking at midnight. I had to wait for my little ones to go to bed first and then join them in baking. We had such a fun day filled with activities and there's not a better to end the day than to bake and eat fresh baked cupcakes right before bedtime. We were singing birthday songs and blowing out candles while the werewolves were coming out at night. How crazy! These kids really had the energy of an energizer bunny. Just kept going and going and never seem to run of battery. As tired as I was that day, it was so much fun spending some quality time with family. The girls enjoyed baking and were very hands on. They measured out the ingredients, mixed everything and even decorated the cupcakes. They did such a wonderful job. I love how the cupcakes look so enticing. It really was yummilicious. You should have been there to try one.


Magnolia's Vanilla Cupcakes from the Food Network website:

Ingredients
Cupcakes:
1 1/2 cups self-rising flour
1 1/4 cups all-purpose flour
1 cup (2 sticks) unsalted butter, softened
2 cups sugar
4 large eggs, at room temperature
1 cup milk
1 teaspoon vanilla extract
Icing:
Vanilla Buttercream, recipe follows
Directions
Preheat oven to 350 degrees F.

Line 2 (1/2 cup-12 capacity) muffin tins with cupcake papers.

In a small bowl, combine the flours. Set aside.

In a large bowl, on the medium speed of an electric mixer, cream the butter until smooth. Add the sugar gradually and beat until fluffy, about 3 minutes. Add the eggs, 1 at a time, beating well after each addition. Add the dry ingredients in 3 parts, alternating with the milk and vanilla. With each addition, beat until the ingredients are incorporated but do not over beat. Using a rubber spatula, scrape down the batter in the bowl to make sure the ingredients are well blended. Carefully spoon the batter into the cupcake liners, filling them about 3/4 full. Bake for 20 to 25 minutes, or until a cake tester inserted into the center of the cupcake comes out clean.

Cool the cupcakes in tins for 15 minutes. Remove from the tins and cool completely on a wire rack before icing.

Marshmallow Frosting: (can't remember where I found this recipe but it was from the internet)

1 TBSP milk
3 TBSP sugar
1/2 bag of marshmallow (~6 oz)
1 TBSP boiling Water
1/4 tsp vanilla extract

In a iny sauce pan on very low heat, warm the milk and sugar. Make sure it doesn't boil over, just want to heat it up.

In a double boiler, melt the marshmallows. When they start to soften, add the boiling water and stir.

Remove from the heat. In your mixer bowl pour the melted marshmallow in as well as the vanilla and beat. Beat in the melted milk/sugar until cooled.

Use an offset spatula to frost. This is very very sticky.

P.S. we only needed about 1/2 the frosting we made.

Vanilla cupcakes & doll cake


Krystin and I volunteered to make Cara's birthday cake this year. So we got together this day to test out the decoration on the doll cake and the lavender infused whipped cream frosting for the vanilla cupcakes. It was our first time using dried lavender and I think we did something wrong the first round because the cream wouldn't whip to a stiff peak. We whipped the heavy cream for a good 10 minutes I think and it just sort of turned into lumps or butter? It was at a point of no return and could not be salvaged or at least we didnt' want to chance having this happen again the 2nd round. So we did a fresh batch and BOY! it really turned out great. The lavender flavor was very subtle and the cream was very light. I could have eaten more but I had to refrain. I have to watch my waist line these days... especially with the slowing metabolism, old age..etc..etc..
Cara and Chance helped with lining the muffin tins. Cara also helped with cutting the purple marshmallow fondant into little shapes for decorating the skirt. We used Betty Crocker cake mixes and premade yellow buttercream frosting for the doll skirt. Krystin decorated the skirt with Cara's help. I think she's got a natural talent for cake decorating. Her hands are a lot steadier than mine that's for sure. My only concern now is I am not sure if we can duplicate the colors for the actual day. I guess we will have to wait and see. I will keep you posted.

Here's the recipe. Enjoy!

Vanilla Cupcakes
from Amy Sedaris
16 cupcakes

1½ sticks unsalted butter
1¾ cups sugar
2 large eggs
2 teaspoons vanilla
½ teaspoon salt
2½ teaspoons baking powder
2½ cups flour
1¼ cups milk

1. Preheat over to 350 degrees.
2. In large bowl, cream together butter and sugar.
3. Beat in eggs, vanilla, salt and baking powder.
4. Add flour in 3 batches, alternating with milk.
5. Beat at low speed for 30 seconds or until mixture is smooth and satiny.
6. Divide batter evenly among cups. Bake for 18 to 20 minutes or until tops are pale gold and toothpick or skewer inserted into center comes out clean.
7. Cool on wire rack for 45 minutes or until at room temperature.


Lavender Frosting Ingredients
http://everythingbaked.blogspot.com/2007/05/fairy-cakes-with-lavender-frosting.html

1/3 cup whole milk
1/2 teaspoon dried lavender
3 cups icing sugar
Violet gel paste food color

Carrot Cake


We had three birthdays this month at work so I volunteered to bring a cake. I have been wanting to make a carrot cake for a while now and this was the perfect opportunity to do so. I found so many recipes online and was not sure which would be the best one to use. So I improvised and ended up making my own version of the cake. I think I added too many ingredients because the cake turned out a little dense. Other than that, most people thought it was moist and delicious. They all thought I should quit my job and open a bakery. Of course, I told them I would never leave my job. I can't even remember which carrot cake recipe I based this off of except for the fact that I added coconut flakes, raisins (soaked in homemade wine 24hrs prior to using), substituted 1/2 the oil with applesauce, and added about an extra 1/2 cup of carrots. I might have over baked it by about 10 minutes too. Plus the cake was made a day ahead and kept in the fridge. For the topping, I used toasted coconut flakes on top and chopped pecans on the sides of the cake. If I were to make this again next time, I am going to tweak it somehow so that the cake would be lighter in texture.

A two layer carrot cake with pecans - frost with the cream cheese frosting.
Cook Time: 30 minutes
Total Time: 30 minutes

Ingredients:
2 cups sifted flour
2 teaspoons baking soda
2 teaspoons baking powder
1 teaspoon salt
2 teaspoon cinnamon
1 3/4 cups sugar
1 cup vegetable oil
4 eggs
2 cups grated carrots
2 cups chopped pecans
Preparation:
Measure and sift together all dry ingredients into a mixing bowl. Blend in the oil and eggs. Fold in grated carrots and chopped pecans. Spoon batter into 2 greased and floured round layer cake pans. Bake at 350° for 25 to 30 minutes. Frost with cream cheese frosting

Whipped Cream Cream Cheese Frosting:

Ingredients
1 (8 ounce) package cream cheese
1 cup white sugar (I probably used a little more than 1/4 cup only)
1/8 teaspoon salt
1 teaspoon vanilla extract
1 1/2 cups heavy whipping cream

Directions
In a small bowl beat whipping cream until stiff peaks form; set aside.
In a large bowl combine cream cheese, sugar, salt and vanilla. Beat until smooth, then fold in whipped cream.

Strawberry Popsicles


I didn't know how easy it was to make popsicles until I came across this recipe and thought "WOW, how simple is this?" I had a big bag full of frozen strawberries and so this was another good way to use them up besides making shakes and bread.
I used my brownie pop mold by Wilton to make these mini popsicles for the kids. It looks like a perfect size but Chance eats about 2-3 at a time. Maybe I'll make bigger ones next time.

Strawberry Popsicle
fr: Bakerella website

2 cups strawberries in this case. Hull and half them.

Throw them in a food processor with 1 Tablespoon super fine sugar, 1 teaspoon lemon juice and a pinch of salt.

Then blend it all together until completely smooth.

Pour and freeze.

Friday, August 6, 2010

Mocha Cupcakes with Whipped Cream Topping


As usual, I made these in a rush and they came out amazingly delicious. This will be my go to recipe from now on when I have a craving for a coffee flavored cake. The whipped cream frosting is really light and goes really well with this cake. If you like mocha, try this and you'll be glad that you did.


Mocha cupcakes with Whipped Cream
adapated from Mmmm...Chocolate (Love-Food)by Parragon Books.
makes 20

2 tbsp instant espresso coffee powder. (I used instant coffee)
6 tbsp butter
1/2 cup superfine sugar (I used granulated sugar)
1 tbsp honey
generous 3/4 cup water
1&2/3 cups all-purpose flour
2 tbsp unsweetened cocoa
1 tsp baking soda
3 tbsp milk. (I used whole milk)
1 egg, lightly beaten

topping
1 cup whipping cream
unsweetened cocoa, for dusting

Preheat the oven to 350F/180C. Place 20 paper liners in 2 shallow muffin pans. Place the coffee powder, butter, sugar, honey,and water in a saucepan and heat gently, stirring. Until the sugar has dissolved. Bring to a boil, then reduce the heat and let simmer for 5 minutes. Pour into a large heatproof bowl and let cool.

When the mixture has cooled, sift in the flour and cocoa. Place the baking soda and milk in a bowl and stir to dissolve, then add to the mixture with the egg and beat together until smooth. Spoon the batter into the paper liners.

Bake in the preheated oven for 15-20 mniutes, or until well risen and firm to the touch. Transfer to wire racks to cool completely.

To make the topping, place the cream in a bowl and whip until it holds its shape. Spoon heaped teaspoonfuls of cream on top of each cake, then dust lightly with sifted cocoa.

Harry & David's Bundt Cake Mix


DIY: Cake Stand


I was admiring a friend's cake stand when another friend Myra overheard and said that she makes her own cake stands. I was so fascinated with this idea so I googled and found some information on how to go about making this exactly. I went to a thrift shop and bought this glass plate and sundae glass for a whopping $3.50. Then I stopped by Lowe's to pick up some Epoxy glue for almost $5. It took me no longer than 5 minutes to put it all together. It took longer to dry. I want to make a few more of these. I just need to find the time to go to the Goodwill Store.

Thursday, July 22, 2010

Bo Kho

I have made this dish twice and really liked it both times so I thought I'd share this with you. This is one of my favorite vietnamese dishes to make. It was so easy and if I can make this, anyone can. I used a Crock pot to cook this but you can use a regular pot was well. I got this recipe from this blog:

http://wanderingchopsticks.blogspot.com/

Bo Kho (Vietnamese Beef Stew)

For a 6-quart pot, you'll need:
1 lb beef stew meat
1 lb oxtails, or substitute with 1 lb short ribs or another 1 lb of beef stew meat
1 tblsp annatto seeds
1/2 cup all-purpose flour
2 stalks lemongrass, bruised
2-inch knob ginger, cut into big slices
1 stick of cinnamon
3 star anise
1 bay leaf
2 tsp Chinese 5-spice powder
2 tsp Ca Ri Ni An Do (Vietnamese Indian Madras Curry Powder)
2 tblsp Nuoc Mam (Vietnamese Fish Sauce)
2 tsp salt
6-oz can tomato paste
2 carrots, cut into 2-inch chunks
3 potatoes or more, cut into 2 -inch chunks
1 cup pearl onions, or 1 large onion, cut into 2 inch chunks

You'll need about 1 lb beef stew meat and 1 lb oxtails. Wash and set aside.


Annatto seeds provide the deep rich red color and a slight sweetness to the stew.

In a large pot on high heat, add 1 tblsp of annatto seeds to 2 tblsp olive oil. The seeds will start releasing their color. Be careful! The seeds may pop in the oil. Keep stirring until the oil turns red. Scoop out the seeds and discard.


Sprinkle about 1/2 cup flour over the beef, making sure to coat each piece. Pan-fry the beef and oxtails until each side is brown. You may have to do this in batches. I just move the oxtails to one side of the pot and stack them on top of each other. When the beef is all browned, add any remaining flour to the pot. It'll help thicken the stew.

Add two bruised lemongrass stalks, ginger slices, a stick of cinnamon, and 3 star anise pods. Also add 1 bay leaf, 2 tsp Chinese 5-spice powder, 2 tsp Ca Ri Ni An Do (Vietnamese Indian Madras Curry Powder), 2 tblsp Nuoc Mam (Vietnamese Fish Sauce), 2 tsp salt, and a 6-oz can tomato paste.

Then fill your pot about 3/4 full with water. When the water boils, turn the heat down to medium and let simmer for an hour.

Meanwhile, prepare your other vegetables. I used pearl onions because I couldn't resist how beautiful they looked. You can dice a large onion instead. Chop up 2 carrots and 3 potatoes, or more if you wish. Keep the vegetable chunks at least several inches in size as they'll simmer for a while and you don't want them to become mushy or lose shape.

Add the vegetables after the stew has been simmering for an hour. Taste and add fish sauce or salt if necessary. Turn the heat down to medium-low and let it simmer for another hour.


After simmering for several hours, the beef stew meat and oxtails should be fall-apart tender. Fish out the ginger, lemongrass, cinnamon, and star anise.

Serve with Vietnamese French bread, rice, or rice noodles.

Apple Pie with Whole Wheat Crust


I totally forgot that I made this on one of the weekends for work. I had bought a big ol' bag of granny smith apples from Sam's Club probably more than a week ago and they were just sitting on my countertop day after day waiting for me to decide what to do with them. Originally, I thought maybe I'll make two apple pies at a time so I might as well have enough apples around. I wasn't feeling up to the task and didn't have the time either so the green apples just sat there. I have other fruits in the same basket so it was ripening faster than fast. The quickest way to handle them was to cut it up and eat it fresh. It was sweeter than I thought and my boys really liked them too. Between me and the boys, we ate almost half of the bag :) I am just glad we were able to consume it and not let it go to waste. I still had a few more, so I made this pie using Krystin's recipe that she found from the internet. I didn't peel the apples just because I wanted to try something new. I am not so sure I like the apple filling with skin on. The skin didn't cook very well and has a slightly rough texture to it. I think I'll just stick to the original recipe next time just to be safe.

Apple Pie Recipe

Ingredients:

2 1/2 cups all-purpose flour, plus extra for rolling
1 cup (2 sticks or 8 ounces) unsalted butter, very-cold, cut into 1/2 inch cubes
1 teaspoon salt
1 teaspoon sugar
4 to 8 Tbsp ice water

Cut up the pieces of butter into small squares. Stick 'em in the freezer for a few minutes.
Meanwhile, mix the flour, salt, and sugar in the bowl of your mixer.
Throw the butter in and mix some more.
Slowly add the ice water by tablespoons until you get a nice mealy texture. I ended up using about six tablespoons.
Dump the mixture onto a clean work surface and kneed a few times.
Shape into two discs.
Place into ziplock bags and chill in refrigerator until ready to use (but at least for 1 hour!).

For the Filling:

Ingredients:

1/2 cup unsalted butter
3 tablespoons all-purpose flour
1/4 cup water
1/2 cup white sugar
1/2 cup packed brown sugar
4-6 Granny Smith apples - peeled, cored and sliced (I used 4)

Melt butter in a small saucepan. Add flour to create a paste. Add water and sugars, mix well. Let mixture simmer for a few minutes.


Bake at 450 degrees for 15 minutes. Reduce temperature to 350 and bake for 30-35 minutes.

Tuesday, July 20, 2010

Coconut Macaroons Recipe

I made these two days ago and they were so easy to make. It was only my second time and I think I have the recipe memorized already. I know I know... it was hard for me to believe it too. Normally, I don't like to memorize anything especially now. Since having two kids, it's been more challenging to remember things because there's a decline in the number of brain cells? At least this is what I have read while pregnant if I can remember it correctly. These macaroons will not disappoint you if you decide to give this a go. Everyone who's tasted this thought it was the freshest, best tasting macaroons they've ever had. I thought it was pretty chewy, not too sweet, and definitely very yummy. If you are a coconut fan like I am, you might like this. I was in a rush for work so didn't get to take a picture. Go to the website below and the picture there is pretty much what mine looked like.


http://www.joyofbaking.com/CoconutMacaroons.html


Coconut Macaroons:

4 large (120 grams) egg whites, at room temperature

1 cup (200 grams) granulated white sugar

1/4 teaspoon salt

1 teaspoon pure vanilla extract

1/2 cup (60 grams) cake flour, sifted

3 cups (300 grams) sweetened shredded coconut


Coconut Macaroons: In a stainless steel bowl, placed over a saucepan of simmering water, whisk together the egg whites, sugar, and salt. When this mixture is warm to the touch, and nice and creamy, remove from heat and stir in the vanilla extract, flour, and coconut. Cover and refrigerate for about two hours, or until firm.

Preheat oven to 325 degrees F (170 degrees C) and line two baking sheets with parchment paper.

Place small mounds (heaping tablespoons) of the batter on the parchment-lined baking sheet, spacing several inches apart. Bake for about 15 to 20 minutes or until golden brown. Remove from oven and let cool on the baking sheet for about 10 minutes and then place on a wire rack to cool.

Makes about 2 dozen Macaroons.

Sources:

Lebovitz, David. Room for Dessert. Harper Collins Publishers. New York: 1999.

Luchetti, Emily. Stars Desserts. Harper Collins Publishers. New York: 1991

Read more: http://www.joyofbaking.com/CoconutMacaroons.html#ixzz0uCk9wh3b

Sunday, July 11, 2010

Fresh Fruit Tart


I was trying to make something unique for a baby shower and wasn't sure what. A coworker of mine was researching recipes for fruit tarts and gave me the perfect idea. It was a great choice because it was not only very pretty, colorful but also very light, healthy and fits the occasion well. Everyone seemed to have enjoyed it. I was able to make one complete crust on a tart pan and 3/4 of a crust on a pie dish using the below recipe. The one in the pie dish I filled with left over pudding and the other one I filled with pastry cream from the recipe below. I made the crust two days prior and prepared the cream the morning of. The cream was very easy to make. The fruits I had to wash one day in advance and dry really well before using. I only wish that I was a better decorator so that it would look more professional. I'll try a different technique with the fruits next time and see how that goes. I didn't use any glaze because It was going to be served within hours. This recipe is a keeper. I can see using this with all kinds of fresh seasonal fruits throughout the year.

Fruit Tart Recipe

Recipe for one 9-in tart or four individual 4-in tarts

Pâte Brisée (crust)

250 g all purpose flour (2 cups)
125 g cold unsalted butter (1/2 cup)
1 tablespoon granulated sugar
1/8 teaspoon salt
1/8 teaspoon vanilla extract
2 to 3 tablespoons cold water


To make the dough, use either a food processor, a mixer or a bowl and the best tools : your hands! Combine all the ingredients except the water. Work the mixture until crumbly. Add the water one tablespoon at a time until you form a dough. It is very important not to over work the dough otherwise your crust will shrink in the oven and you will not have that light, flaky kind of crust. wrap the dough and chill for at least 30 mn. This step can be prepared up to 2 days in advance. Just wrap the dough well and keep it in the fridge.

Pastry Cream

1 cup whole milk (don't use low fat versions please)
2 egg yolks
40 g (2.5 TBSP) granulated sugar
30 g (2 TBSP) corn starch
1 teaspoon vanilla extract
1/4 cup heavy whipping cream

Heat the milk in a pan over medium heat. Meanwhile, combine the egg yolks, sugar and corn starch and mix until well combined. Gradually, add the hot milk. Put the mixture back in the pan and cook, stirring continuously (not the time to answer the phone, yeah yeah I know baking requires a lot of sacrifice) until it thickens. Off heat, stir in the vanilla. Transfer to a bowl and cover with plastic wrap and let cool at room temperature then into the fridge for up to 2 days.
When ready to use, whip the cream and fold it into the COLD pastry cream.


Preparing the tart shells

Preheat the oven to 375. Remove the dough from the fridge and if it got too hard, let it sit for about 15 minutes. Flour your work surface and roll out the dough to about 1/4 in thickness. I like my crust pretty thin.
Arrange the dough on the mold (s) of your choice. Pick the entire surface of the dough with a fork and layer a piece of foil on top of it. Fill the foiled pan with beans. This will help the crust keep its nice shape.
Cook the crust for 10 minutes then remove the foil (and the beans!) and continue baking until lightly brown. Cool completely before filling.

Custard Filled Tassies


I got this idea from Martha Stewart's website. Instead of using cream cheese for the filling, I substituted it with Pudding and topped it with blueberries. After a few trials of preparing pie/tart crusts, I think I am an expert now..ha ha. I no longer have fears or doubts about making a crust. I just jump right in and get to work. And for the most part, the crusts come out tasting fresher and possibly better than the ones from the store. In this case, the crust is what makes this recipe so incredible. It's buttery, flaky, and crunchy. Topping this with pudding and blueberries makes this more weight watcher friendly and the fact that it's not too sweet also helps. I only use the below recipe for the crust.

Lemon Tassies

Ingredients

Makes 24

FOR THE CANDIED LEMON ZEST:
2 lemons, well scrubbed
1 cup sugar, plus more for rolling
1/2 cup cool water
FOR THE CRUSTS:
5 tablespoons cold unsalted butter, cut into chunks, plus more for pans
1 cup all-purpose flour
3 tablespoons sugar
1 large egg yolk
1/2 teaspoon pure vanilla extract
1 teaspoon finely grated lemon zest
Pinch of salt
FOR THE FILLING:
8 ounces cream cheese, room temperature
1/3 cup sugar
1 large egg
3 tablespoons finely grated lemon zest
1 tablespoon freshly squeezed lemon juice
1/2 teaspoon pure vanilla extract
Directions

For candied lemon zest: Remove zest from lemons with a vegetable peeler, keeping pieces long. Remove white pith using a paring knife, and finely julienne using a very sharp knife. Place julienned zest in a small bowl; cover with boiling water. Let stand for 30 minutes; drain.
Bring 1 cup sugar and the cool water to a boil in a small saucepan over medium-high heat. When sugar is completely dissolved, add julienned zest, reduce heat to medium-low, and cook for 10 minutes. Remove from heat, cover, and let stand overnight. Remove zest, and drain on wire rack. Roll in sugar. Dry on wire rack. Store zest in an airtight container for up to 2 weeks.
Preheat the oven to 350 degrees with rack in upper third. Lightly butter a 24-cup mini-muffin pan; set aside. In a food processor fitted with a steel blade, combine the flour and butter. Pulse until mixture is the consistency of fine crumbs. Add the sugar, egg yolk, vanilla, lemon zest, and salt. Process until evenly incorporated and smooth; do not overprocess.
Divide the dough into quarters. Divide each quarter into 6 pieces. Shape into balls. Place each ball in a muffin cup; press down in the centers so that the dough fits the cups snugly. Set muffin pan on a baking sheet.
Bake until lightly browned all over and slightly darker at the edges, 15 to 20 minutes. Transfer baking sheet with muffin pan to a wire rack to cool.
Make the filling: In an electric mixer fitted with the paddle attachment, beat cream cheese, sugar, egg, lemon zest, lemon juice, and vanilla until completely smooth. Using a 1/4-ounce ice cream scoop, fill the cooled crusts. Bake until filling is set and just beginning to color at the edges, 10 to 12 minutes. Transfer muffin pan to a wire rack. Garnish with candied lemon peel. Let cool completely before serving. The tassies may be stored in an airtight container, refrigerated, for up to 3 days.
From Martha Stewart Living Television


Read more at Marthastewart.com: Lemon Tassies and more delicious recipes, smart cooking tips, and video demonstrations on marthastewart.com

Parisian Macarons with Swiss Merengue Filling


I didn't get to comment on this recipe before publishing it. I was uploading a whole bunch of pictures and got a little impatient and tired of waiting for one picture to load at a time. Does anyone know a faster way to upload multiple photos at once? I think I would post more pictures if I could figure out a faster method. So getting back to these macarons, I first learned about these cute little things from the bakerella website but didn't dare to attempt this because I needed a scale to weigh ingredients out if I wanted to be accurate. I don't have a scale and am not ready to purchase one....yet. So I just left the idea. You might ask what is it exactly? I found this in wikipedia that might define it better:

A macaron is a sweet confectionery. Its name is derived from an Italian word "maccarone" or "maccherone". This word is itself derived from ammaccare, meaning crush or beat, used here in reference to the almond paste which is the principle ingredient.[1] It is meringue-based: made from a mixture of egg whites, almond flour, and both granulated and confectionery sugar.

The confectionery is characterized by its smooth, domed top, ruffled circumference, and flat base. Connoisseurs prize a delicate, egg shell-like crust that yields to a moist and airy interior. The French macaron differs from macaroons in that it is filled with cream or butter like a sandwich cookie, and can be found in a wider variety of flavors that range from the traditional (raspberry, chocolate) to the exotic (truffle, matcha tea.

I saw a similar recipe on Martha Stewart's website and it looks a lot easier. I read through her version and thought well maybe I can do this if only I have a block of time to focus just on this. I really didn't know what to expect of this because I have never had a macaron before. Also because my egg beating/whipping technique needs fine tuning. I have had multiple bad experiences working with egg whites. It's really hard for me to tell when the egg whites have turned into a soft peak versus a stiff peak. It's a guessing game everytime and I really don't like doing that which you can understand why. So this recipe says to beat the eggs til it turns a soft peak and I think I did just that. Looking at the outcome of the cookies, I think I might have miscalculated that step or maybe I over folded the ingredients. Whatever the case, mine didn't look quite like the ones you see on the internet. As far as taste goes, I would think it should taste a little like a merengue cookie, light and airy in texture with filling? My filling came out a little on the salty side. While I should have used unsalted butter, I didn't. The salted butter had more salt in it than I thought. I didn't think it was too bad. It was so light, I must have ate 10 in a span of 30min. I think I'll make this again with other types of filling and maybe use food coloring to add some visual appeal.


Recipe:
http://www.marthastewart.com/recipe/parisian-macaroons

Red Velvet Cupcakes with Cream Cheese Frosting


Don't these look scrumptious? I made these for the July birthdays at work. I was not feeling 100% that day but didn't want to not keep my promise. I only tasted 1/2 of one and didn't crave for anymore. Everyone at work really liked the taste. They especially liked the cream cheese frosting. I did reduce the amount of sugar added to the frosting (used 1 cup only) and substituted sour cream for 2 TBSP of my homemade yogurt for that extra tart. Even though this is a great recipe, I won't necessarily make it again or will I ever buy a red velvet cake just because there's so much food coloring added to it. I am not exactly sure how food coloring affects our body but I'd rather keep its use to a minimum if I can control it. I found this from all recipes and it has the highest ratings compared to the other ones.

http://allrecipes.com//Recipe/red-velvet-cupcakes-3/Detail.aspx

Rocky Road Brownies


So it's been awhile since I've published anything but it doesn't mean I haven't been baking. You'll just get all my posts at once that's all. Don't be overwhelmed it's really not that bad. I did subscribe to a few food blogs and so I get all their publications in my email and when I saw this one I thought I just had to make this. I love rocky road ice cream. These brownies were so chocolaty and moist and delicioso. It's not something that you can eat just one. It was pretty easy to make so why not try it. Here's website for the recipe.

http://www.joythebaker.com/blog/2010/06/rocky-road-brownies/

Saturday, June 26, 2010

Ban Bo


Teresa was kind enough to share this recipe with me. She said hers turned out very moist and soft in the center. I saw a picture of her creation and really liked the idea of baking it in a bundt pan. It looked very pretty and I was convinced that I had to make this in a bundt pan. Of course I don't own one so I went to Harry and David's for something else but saw this while shopping and just couldn't leave without it. So there's my ban bo in a bundt pan. Don't you think it's too pretty to eat? I think I almost like the shape of it more than the taste itself. Anyhow, now that I have a bundt pan, I'll be making plenty of other goodies that's bad for your health but yummy for your taste buds.

1 can of coconut milk --i would use 1/2 can of coconut milk with 1/2 can of water instead.
400 gram of palm sugar (9 cubes) -- i would use about 7-8 cubes instead.
300 gram of tapioca starch
7 eggs lightly beaten
1 Tbs + 1 tsp baking powder

I would do the preparation one night ahead.

I've altered the recipe a bit. I used 1/2 can of the coconut milk and substitute the other half with water. I also cut down a bit on the palm sugar. I used 7 -8 cubes instead.

1. Pour 1/2 can of coconut milk and 1/2 can of water in a sauce pan over low heat. Add the palm sugar and melt it in the coconut milk. Let cool completely. This coconut-sugar mixture will be added to the batter later. You do not want to add in hot liquid mixture with the batter. So make sure you let it cool completely. I would let it sit over an ice bath.

2. Lightly beat 7 eggs in a bowl. Just lightly so the yolk is mixed well with the whites.

3. In a separate mixing bowl, mix the tapioca starch and baking powder together.

4. Add the eggs to the tapioca starch mixture. Lightly mix the batter by hand.

5. Add and mix the palm sugar to the batter.

6. With another big bowl, use a strainer and pour the batter through the strainer about 2-3 times. Use a strainer with big holes (about a size of a red bean should be good. Any holes smaller will be difficult for the batter mixture to pass through) I would do this about 2-3 times so that the eggs are really broken up with the batter.

7. Let the batter sit overnight.

8. Set oven at 375 degrees.

9. Grease the baking pan. Add batter to the baking pan

10. Bake for about 40-45 minutes until golden brown.